Everything You Need to Know About Picking the Right Kitchen Knife

Any good chef or seasoned home cook will tell you that when it comes to kitchen tools, good knives are critical. But even if you’re tying on your apron as an at-home chef for the first time, knowing which knife to use for certain tasks is *just* as important as knowing how to properly cut that organic produce. So chop chop! Get in the know with this comprehensive infographic below!

knife_knowledge.png

1. Chef Knife: With an 8-14 inch blade, this bad boy is the quintessential kitchen knife for day to day duties like dicing, mincing, and julienning. A chef knife is also great for cutting or slicing into meats, which makes this all-purpose tool a handy one to have in your collection.

2. Paring Knife: This blade typically measures between 2-4 inches. It might be tiny, but it’s incredibly useful when it comes to meticulous tasks like skinning fruits, deseeding small peppers, and deveining shrimp. Much like a chef’s knife, the paring knife is designed for all, albeit smaller, purposes.

3. Utility Knife: This blade is another all-purpose option, but with its 6-8 inch blade, it’s smaller and possibly less intimidating than a chef knife. You may not be able to slice into most meats as easily, but fish is a safe bet. This blade is also ideal for cutting up cheese, vegetables, and fruits.

4. Serrated Knife: Every household should have a serrated knife, which is often referred to as a “bread knife.” Thanks to its wavy blade, you can successfully saw through crusty breads, flaky desserts, and even tomatoes, without squashing their plush interiors. If you’ve been using any other knife for such tasks, stop now; go to the store, and buy a serrated knife. You’ll thank us.

5. Santoku Knife: This glorious knife is a Japanese design and is fab for slicing and dicing. Because of it’s multi-purpose functions, it can be used in place of a chef knife. In fact, some folks prefer it because it’s lighter, yet still gets the job done.

6. Boning Knife: This 5-6 inch blade is pretty limited in its duties, but it’s super useful if you perform these duties often. Trimming fat and carving meat from bones doesn’t just require precision, but also a strong blade that is slightly flexible and really sharp.

Chop Chop!

You Finally Bought an Instant Pot! Here Are 10 Tips on How to Use It Properly

Perhaps your Instant Pot has been sitting in the box for six months, you just brought it home, or you’re seriously thinking about making the investment. It’s different from slow cookers and traditional pressure cookers - it comes with a set of instructions all its own. Settle in, and take a look at the 10 tips you need to know about working your Instant Pot safely and successfully.

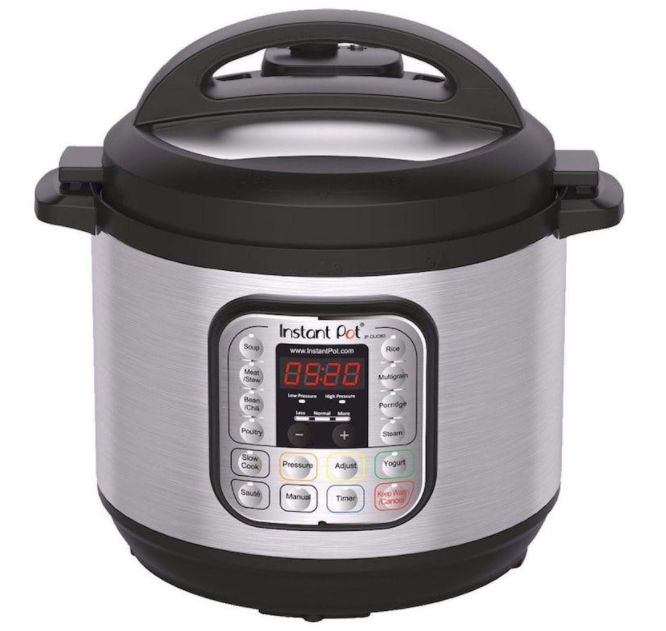
instant-pot

1. You’ll rely on pretty much one button. Sure, there’s a poultry button, a rice button, and a multigrain button, but the one you’ll use most often is manual.

2. Don’t ignore the sauté function. Unlike a slow cooker, which cooks food through prolonged indirect heat, the Instant Pot has the ability to sauté and sear ingredients for optimal flavor. If you’re cooking something like skin-on chicken thighs, you’ll start with the sauté function to sear the meat, then add your cooking liquid, lock the lid, and use the manual button to finish out the cooking process.

3. There’s more than one way to relieve pressure. You can release pressure from the Instant Pot in two ways. There’s the natural release method and the quick release method. Once your timer goes off, you can allow it to sit and depressurize naturally, which takes approximately 10-30 minutes depending on your amount of liquid. The more liquid content, the longer it takes. The quick release method is used by manually turning the steam release handle to the “venting” position to let the steam out of the cooker for faster cooling. This method takes about 1-2 minutes to depressurize and you’ll actually see the steam releasing from the vent.

4. You always need liquid. At least one cup, to be exact. Too much liquid will weaken the flavor of your dish, and increase both the pressure release time and the amount of time it takes to get to pressure.

5. Beware of over-filling the Instant Pot. The lines on the inside of the bowl indicate how much the Instant Pot can safely hold when using the sauté function only.

6. Don’t force a locked lid. When the Instant Pot is finished depressurizing, it will automatically unlock to indicate that it’s safe to open. There’s a floating valve on the lid located by the venting knob that will drop when all of the pressure has been released.

7. Your 10-minute recipe may actually take 30. The time indicated on most recipes refers to the time it takes for the dish to cook once the Instant Pot comes to pressure, which could take 10 minutes depending on the liquid content. By the time your Instant Pot comes up to pressure, cooks the food, and then depressurizes, you’re looking at tripling the time the recipe typically says. The good news is that there’s little effort involved, and that dish may normally have taken an hour on the stove.

8. Play with the adjust function. If you want to go back and forth between functions, the adjust button will be your best friend. For example, if you’ve been cooking something on the slow cooking function for several hours and you want to bring it to a boil at the end, press the adjust button whenever you’re ready, and then push the boil button to start that process.

9. Start simple. Don’t unbox your new Instant Pot and then try to make the most complicated thing you can think of. Start with something basic like rice or hard boiled eggs to get your feet wet and get used to the venting process. Then, you can move on to fun things like beef bourguignon.

10. Invest in a few accessories. Your Instant Pot will come with a few basic accessories, but there are all kinds of goodies you can get to make your cooking process more fun and simple. Stackable metal containers will allow you to cook multiple dishes at one time, large steamer baskets accommodate eggs and veggies, and springform pans are great for lasagna and cheesecake.

Happy Cooking!